Creating Channels
Channels are the foundation for receiving audio and video sources (inputs) and distributing them via outputs. Each channel is associated with an Agent (remote device or software) and can have multiple destinations.
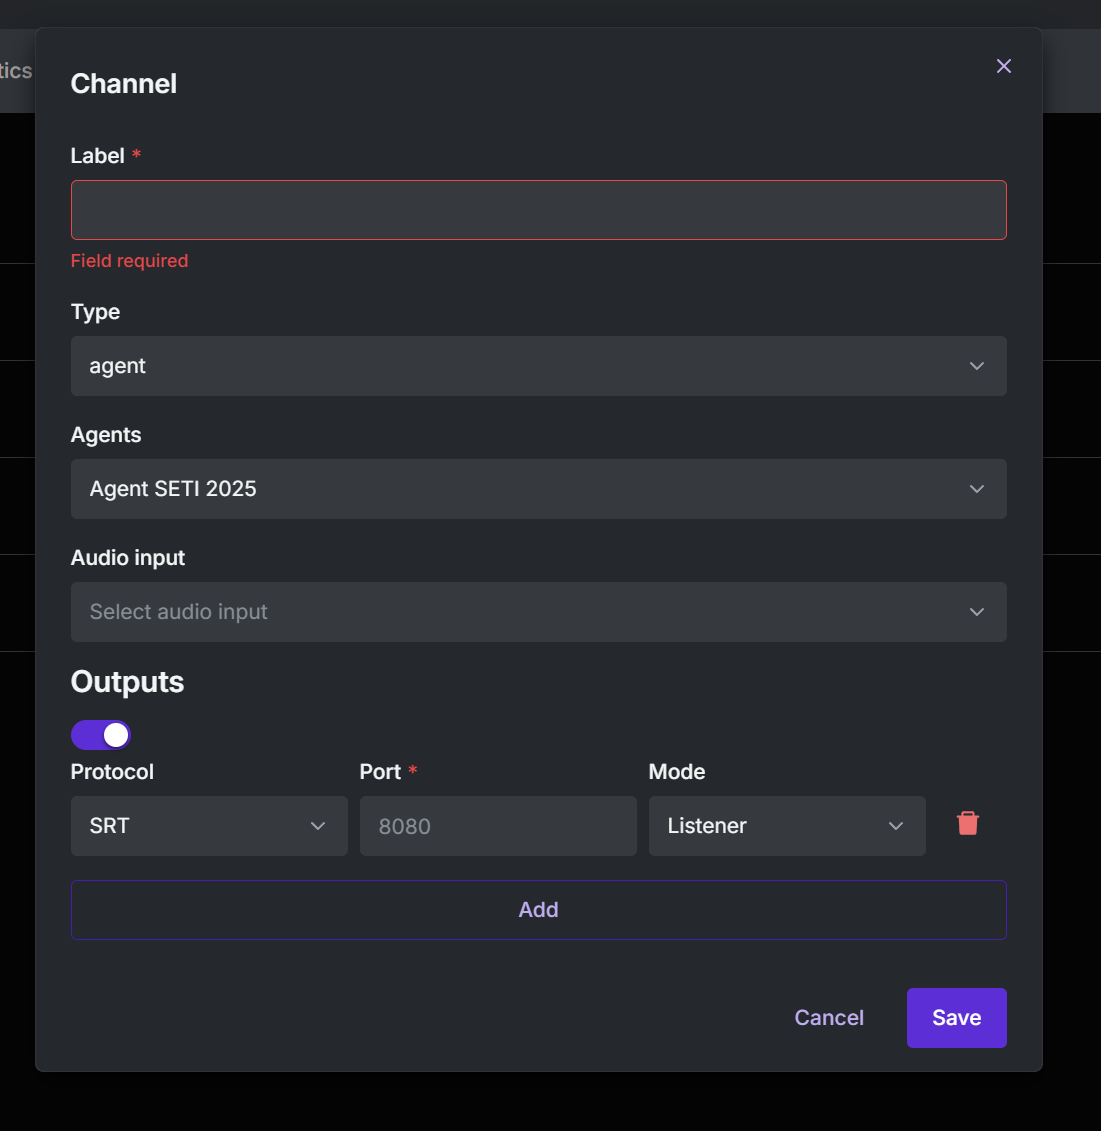
Modal Fields
Label *
Required
Channel identifier (e.g., Main Camera, Reporter 1).
- Must be unique within the workspace
- Appears in the player and analytics
Type
Defines the channel source type:
- Agent: Feed coming from a remote device (Souv Agent)
- Link: Distribution channel backed by an URL (ideal for external players and integrations)
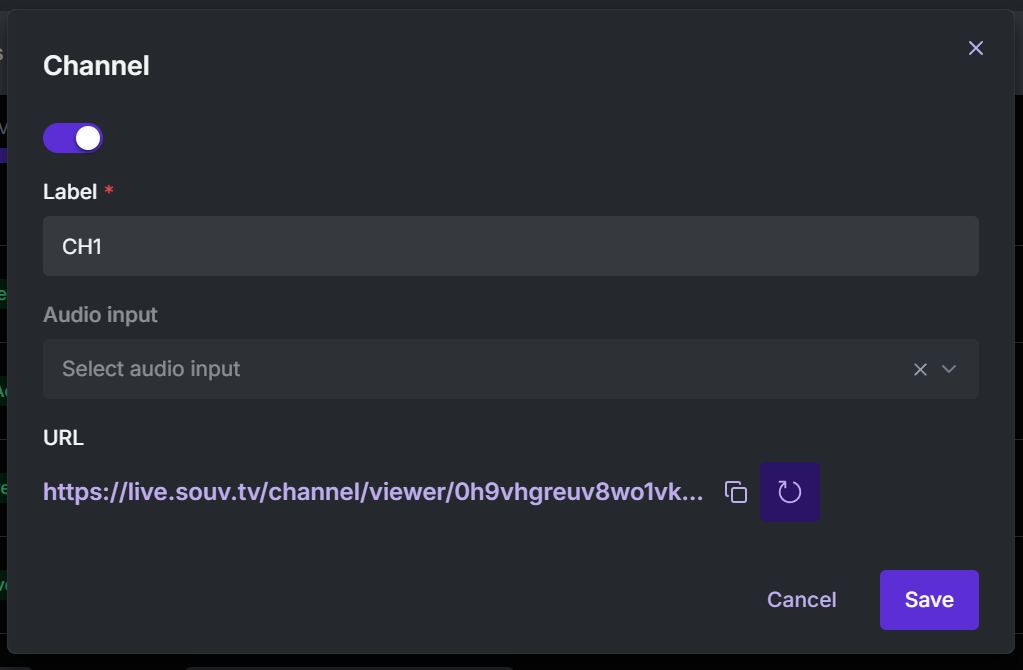
Link Type
The Link type is used when you want a channel whose output is a public URL automatically generated by Souv Live.
This URL can be distributed to:
- external players
- internal systems that consume video over HTTP
- portal integrations
- direct viewing in browsers
Fields shown in Link mode
-
Activate channel
Switch button to turn the channel on or off. -
Label
Channel identifier. -
Audio input
Selects the audio source used by the channel. -
URL
Exclusive address generated by the system.
You can:- Copy the link
- Regenerate a new link (if you need to invalidate the previous one)
✅ The Link channel is perfect when you need to distribute the live feed without configuring protocols such as SRT, NDI, or RTMP.
Agents
Selects the Agent that will send the content:
- Example: Agent SETI 2025
- Only online agents with permission show up in the list
Tip: Make sure the Agent is connected and using a compatible version
Audio input
Chooses the Agent’s audio source:
- Options depend on the device hardware (microphone, line-in, etc.)
- Default: the device’s main input
Outputs Section
Configure the destinations where the channel will be streamed.
| Field | Description |
|---|---|
| Toggle | Turns the output on or off |
| Protocol | Output protocol: SRT, RTMP, NDI, etc. |
| **Port *** | Input port on the server (e.g., 8080 for SRT Listener) |
| Mode | Listener (receives stream) or Caller (sends stream) |
| Trash | Removes the output from the list |
Configuring Outputs
The Outputs section lets you set external destinations for your live transmission. Each output is configured with a protocol, name, and destination address.
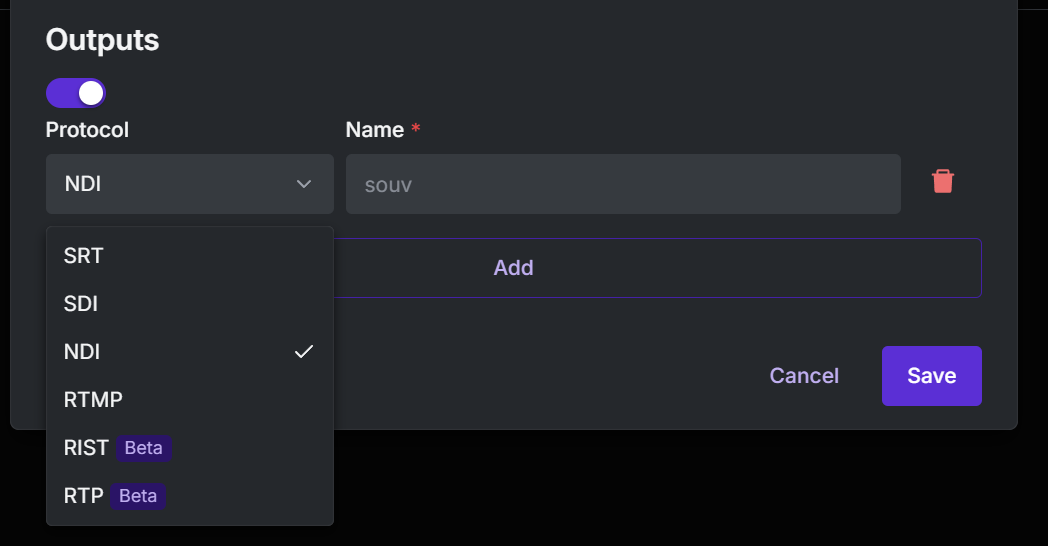
Available Protocols
| Protocol | Short Description |
|---|---|
| NDI | Low-latency HD/4K video over the local network. |
| SRT | Secure, reliable streaming over unstable networks. |
| SDI | Uncompressed professional digital output via coaxial cable. |
| RTMP | Standard for sending streams to platforms like YouTube and Facebook. |
| RTSP | Common in IP cameras, DVRs, and compatible players. |
| RIST (Beta) | Open-source alternative to SRT with packet recovery. |
| RTP (Beta) | UDP-based streaming for advanced IP pipelines. |
Tip: For multiple destinations, click Add and configure new outputs.
How to Configure
- Enable the toggle to activate the output
- Choose the Protocol
- Enter a Name
- Fill in the destination address
- Click Save
Active Channel List
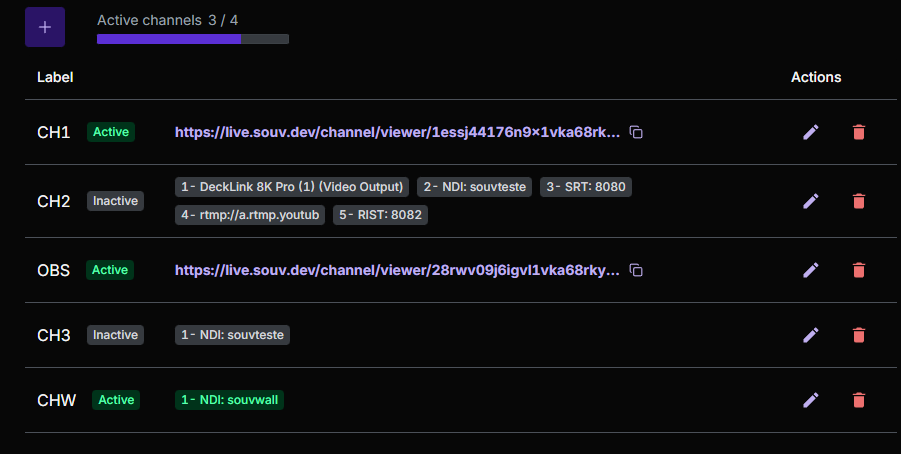
In this interface you can:
- See active and inactive channels
- Edit a channel
- Delete it
- Copy the distribution link
- Check the overall license status (active channel limit)
⚙️ The maximum number of active channels depends on the license tied to the account.
Activating a Channel
To activate or deactivate a channel, open the edit modal:

- Click the edit icon
- Use the switch to activate
- Click Save
When active, the channel appears as Active in the list.